Power Automate: Power BI alerts to be sent by email from an excel file based on condition
I will explain how to send a list of emails from an excel file using Power Automate after creating alerts in Power BI but emails will be sent only if they comply with some conditions. Before to start, I will need:
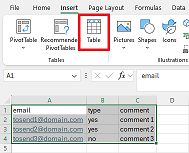
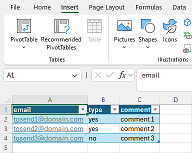
- To have my excel file in the cloud (onedrive, sharepoint, etc.) and that I have formatted my data into a table
- To have created my alarms, if you don’t know how, read Power BI: create an alert for notification
Now that I have my alert, I will click on “use power automate…”:
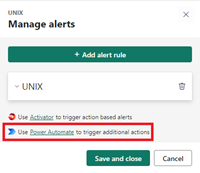
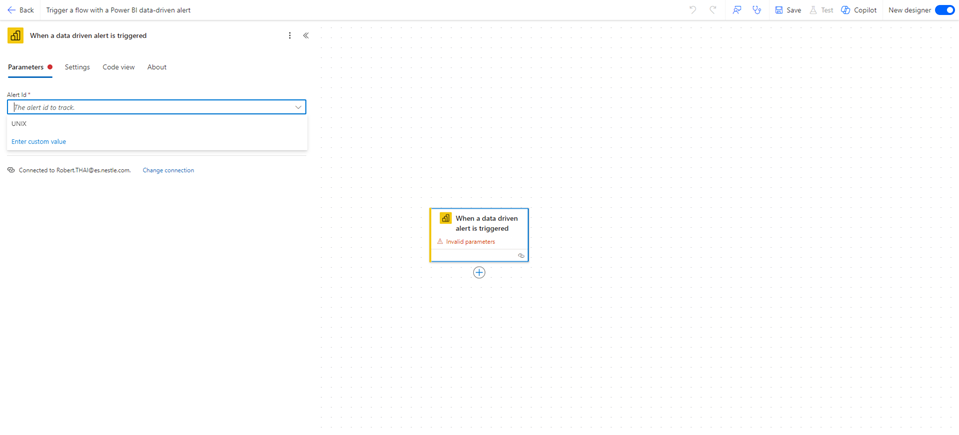
I will be directed to it then follow the instruction to reach the flow setup. As you can see, the “invalid parameters” is showing in red so I will click on it and I just have to select my alert called “unix”:
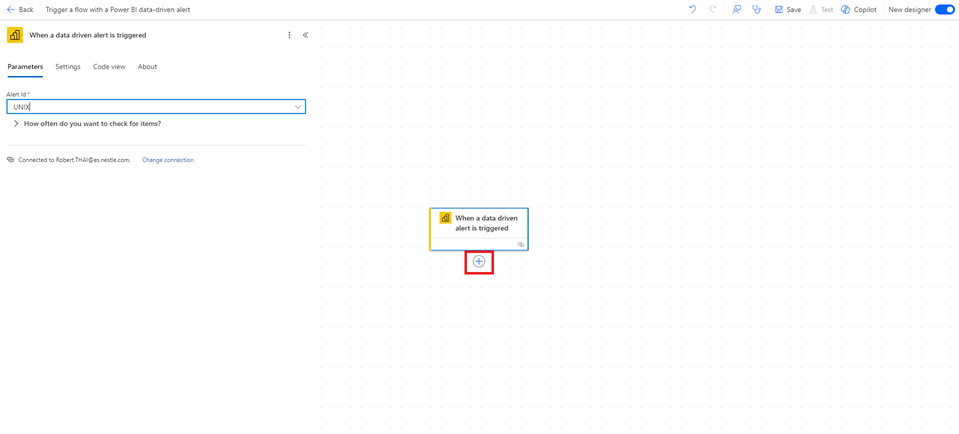
I will click now on the “+” to add a first action:
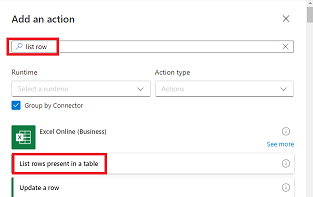
At this point, I may be asked to sign in if not done yet. Once done, in the search bar, I will put “list row” then select “list rows present in a table”:
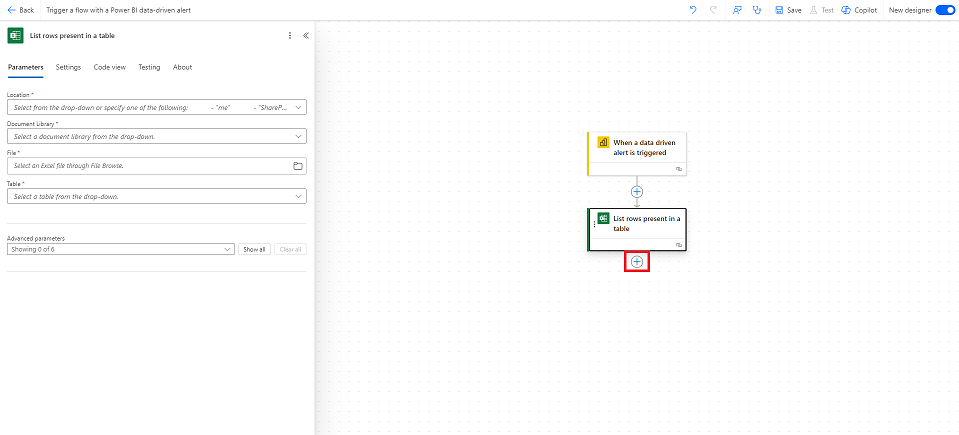
Fill up all fields about the location of the excel file and the name of my table then click again to the “+” to add a second action:
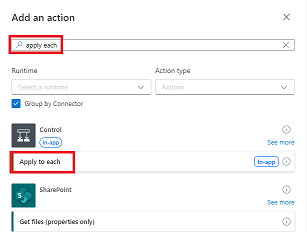
In the search bar, put “apply each” then select “control – apply to each”:
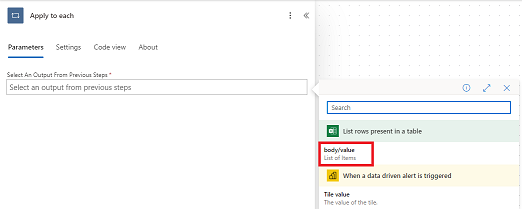
 Click on the field to make appear the “lightning” icon:

Click on it to select “body/value” (make sure to select it from the correct excel action, for instance, if I have 1 list rows and 1 update row, I have to select the one from the list rows):
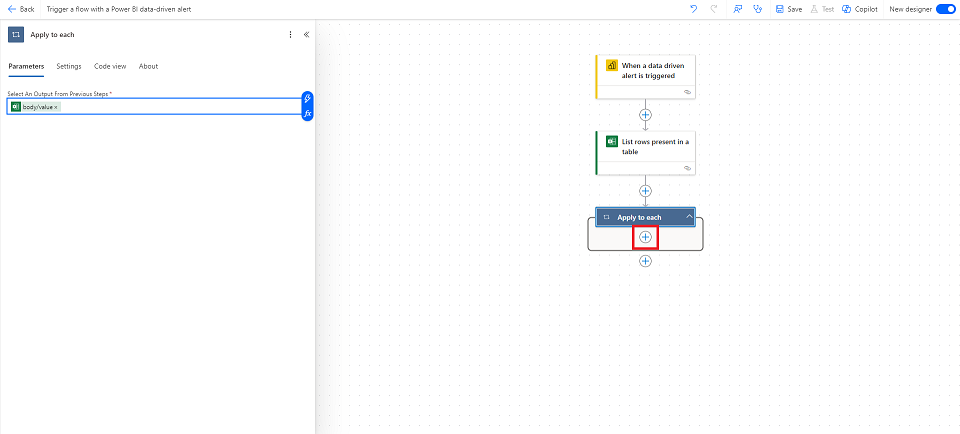
Click to the “+” of “apply to each” to add a third action:
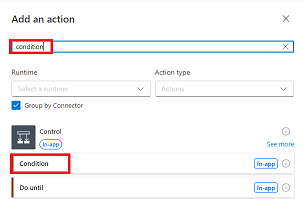
In the search bar, put “condition” then select “control – condition”:
Fill up the fields (again, make sure to select it from the correct excel action):
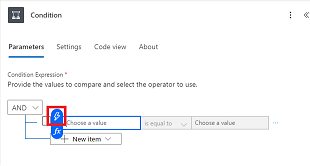
- Click on the “choose a value” (left one) in order to click on the “lightning” icon to select the excel column, for my example, it will be “type”
- Click on the “is equal to” to select the one that fits best for me
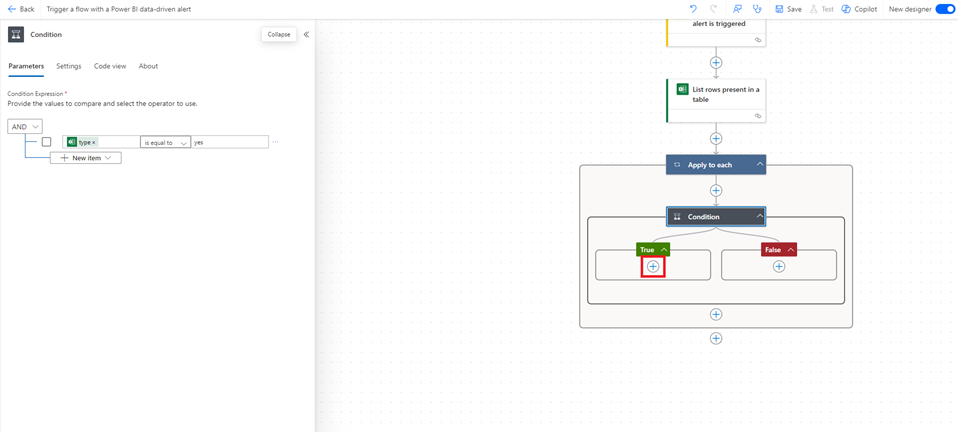
- Click on the “choose a value” (right one) to put manually the value of the excel file for the selected column, for my example, it is “yes” so only email with “type = yes” will receive a notification. Since it is case sensitive, I have to put it exactly as in my excel file so if the value was "Yes", I will have to put "Yes"
Click to the “+” of “true” to add a fourth action:
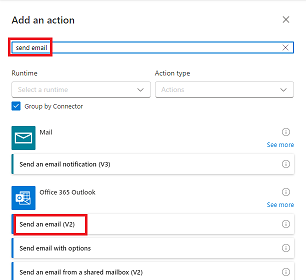
 In the search bar, put “send email” then select “office 365 outlook - send an email (V2)”:
Click on “switch to advanced mode”:
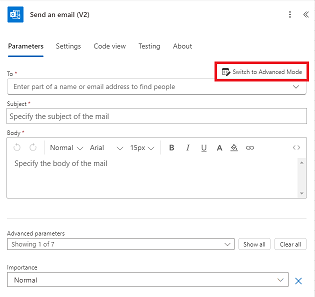
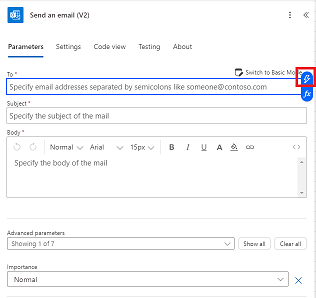
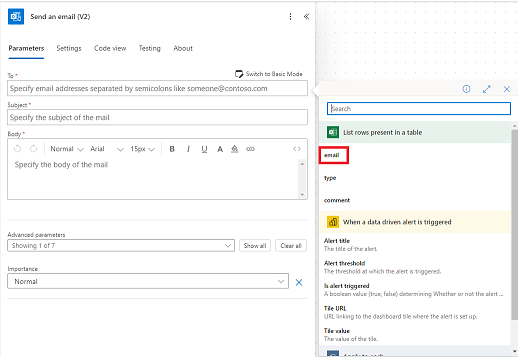
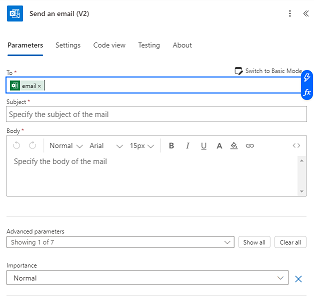
Click on the “to” field to make appear the “lightning icon” then click on it in order to select “email”:
 |
 |
For the other fields:
- In the “subject”, put manually or if in my excel file, I have a “subject” column, use the “lightning icon”
- In the “body”, write manually the content and if in my excel file, for instance, I have a “name” column, use the “lightning icon” to personalize my email
- In the “advanced parameters”, add some options like from, CC, BCC, etc.
- In the “importance”, choose the one that fits best for me
NOTE: each time that I am selecting a column from my excel file, I will make sure to select it from the correct excel action
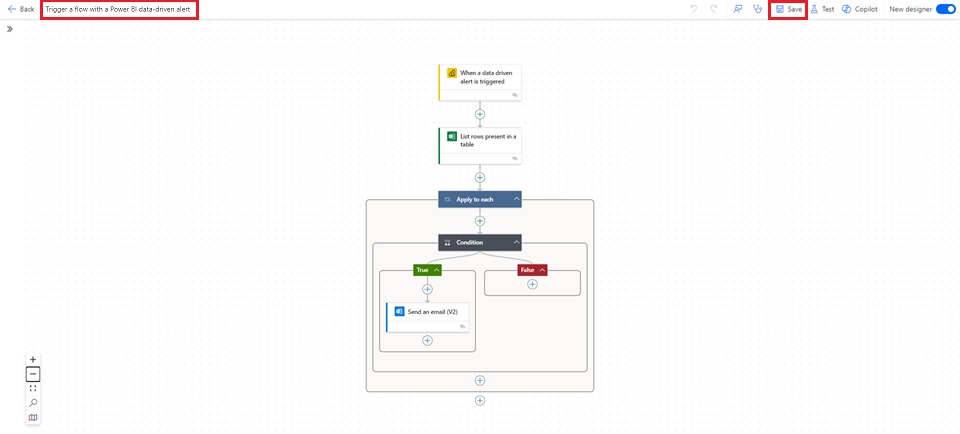
I will change the name of the flow by clicking on the title (on the top just next to “back”). Once done, to finish, I just have to save it:
NOTE:
- To add a picture, read Power Automate: add a picture in an email
- To add an attachment, read Power Automate: add an attachment in an email
Interesting Topics
-

Be successfully certified ITIL 4 Managing Professional
Study, study and study, I couldn’t be successfully certified without studying it, if you are interested...
-

Be successfully certified ITIL 4 Strategic Leader
With my ITIL 4 Managing Professional certification (ITIL MP) in the pocket, it was time to go for the...
-

Hide visual and change background color based on selection
Some small tricks to customize the background colour of a text box...
-

Stacked and clustered column chart or double stacked column chart
In excel, I use a lot the combination of clustered and stacked chart...
-

Refresh Power BI
From the Power BI Service, I can set refresh but, for instance, there is no option to do it monthly or each time a change is made...
-

Power BI alerts to be sent by email from an excel file based on condition
I will explain how to send a list of emails from an excel file after creating alerts...


